Posted on

Hot Pot Crazy | The basics to making Hot Pot at home

Yes, you read the title correctly. I think I have a problem. I have become Hot Pot crazy; obsessed with Hot Pot; eating it 2-3 times a week (sometimes more). It is the middle of summer and yes I am eating Hot Pot. Why you ask, do I love Hot Pot so much? Well… it is a great group meal and the variety of ingredients are endless. And a good broth makes my soul smile.

Hot Pot starts with a hot broth which can be spicy, sweet, sour, etc. There are so many varieties of Hot Pot broth, it is crazy. Most people like it spicy, but I prefer not. Here are the Hot Pot broths that I found at my local Asian market that is my favorite.

And two others I will be trying in the future. The also have a spicy one that I have tried as well.

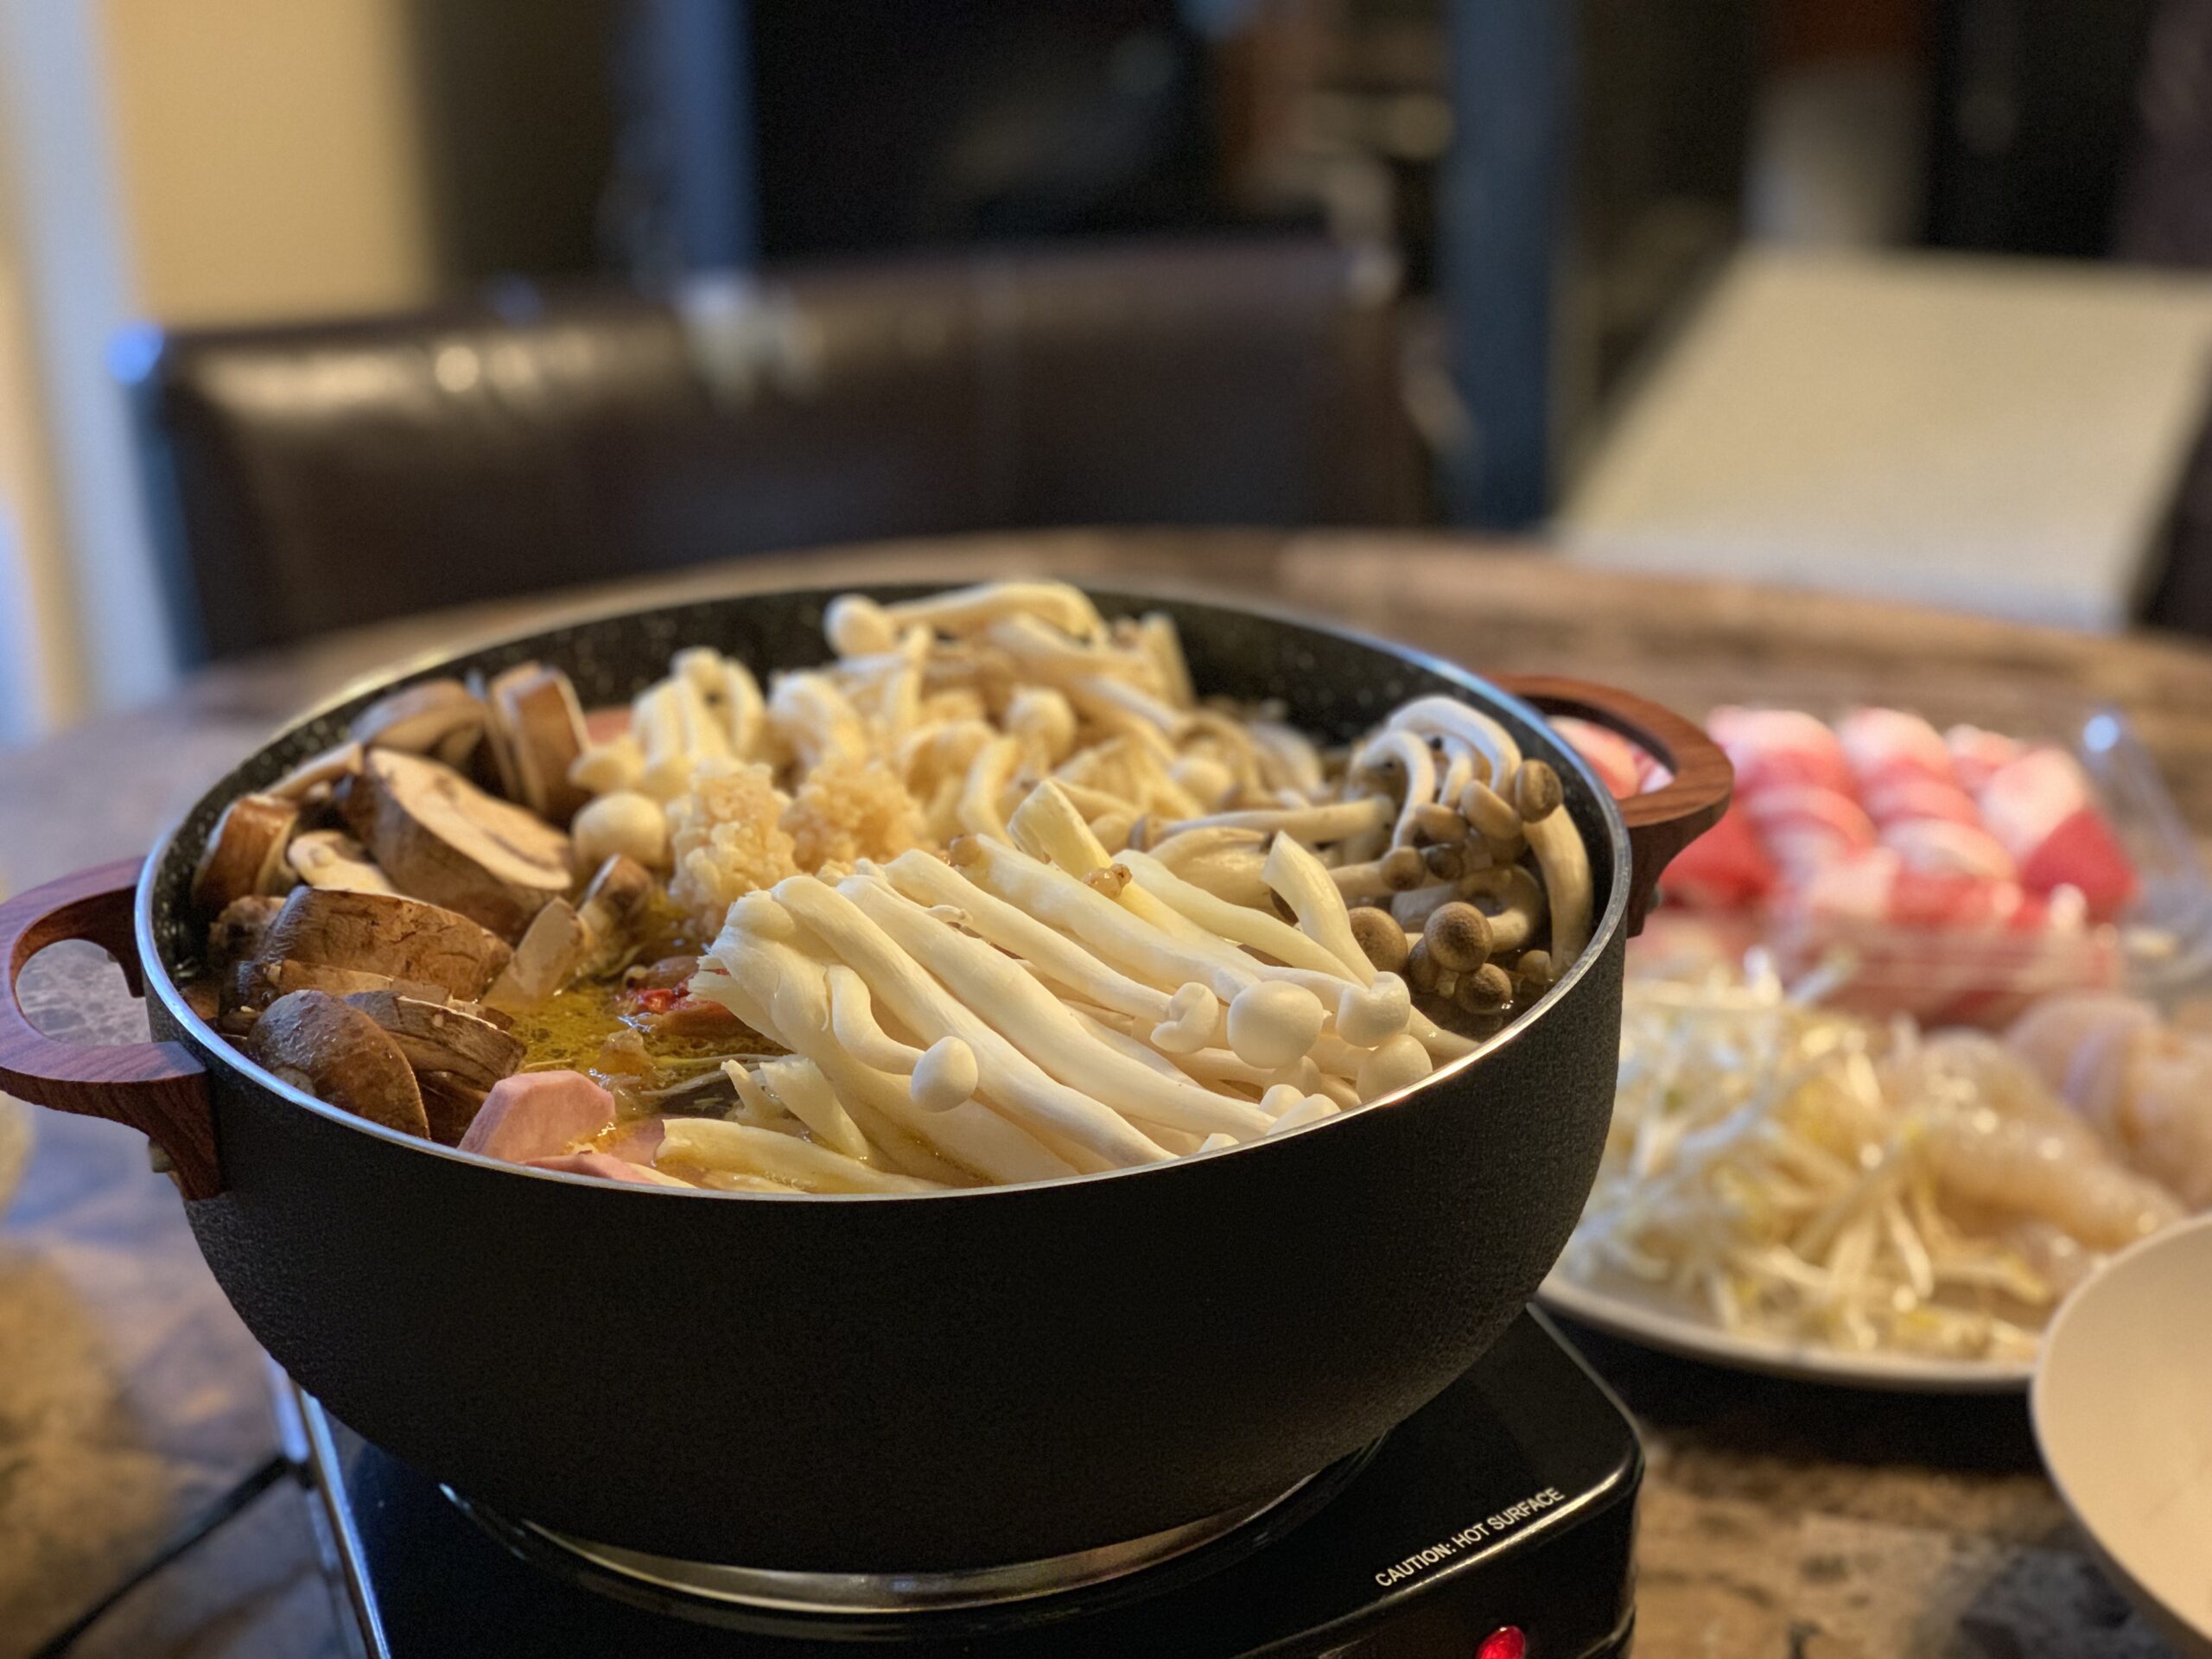
And then there are the veggies. Take your pick and add them in. My go-to veggies are a variety of mushrooms, yellow squash and or zucchini, bok choy, cilantro and some type of hot pepper. However, one of my recent Hot Pots I used purple broccoli which worked well. I suggest using veggies that you know will stand up to the boiling, however, you can use any veggies, but if you know that a certain veggie cooks extremely fast like spinach, use it, but just add in what you know you are going to eat immediately and then add as you go.

Grey squash and hot peppers
White and Brown Beech Mushrooms
Spicy Hot Pot broth, yellow squash, purple broccoli, and whole tilapia and more

Hot Pot is not all about the veggies and broth, you can also have seafood or paper-thin sliced meat, all to add as you go. I have tried both meat and seafood.

Additionally, another ingredient I love to add to Hot Pot is dumplings (Mandu) of all varieties.

Assorted Mandu (Dumplings) and Cilantro
Varied Dumpling added to the Hot Pot!
Various Dumplings and Mushrooms, bean sprouts and green onion

There are so many different types of dumplings, it is fun just trying different ones and seeing what you like and don’t like.

To make Hot Pot, you are going to need a nice size pot for boiling and I recommend a heavy one that will keep the heat. You can purchase a Hot Pot from your local Asian Market; they usually come with spacers inside so that you can have more than one types of broth and it is equipped with its own heating unit, so no burner required. Here is one from Amazon.

I just purchased a non-stick Caldero pot which is usually used for soups. I purchased one from my Asian market, but here is one similar to the one I used when I cook Hot Pot. Either will work.

The only other thing you need is a single cooking burner that you can put on your table; unless you get the actual Hot Pot as mentioned above. There are butane burners which are very commonly used for Pot Pot,

or you can use an electric one like I have.

I have added a link to both options from off of Amazon, just click on the pictures.

See what I am saying about going Hot Pot crazy. The options are endless and delicious and you can tailor it your taste buds. I hope you give it a try either in a restaurant or make it at home. I had my first experience at a restaurant and afterward, it has been Hot Pot at home!!! I hope you enjoyed this blog and check out the video link (just click on the photo below) if you want to see how I make a Hot Pot at home.

Until Next time, Remember to Cook, Eat and Enjoy!!!

Posted on

Apple Cinnamon and Blueberry Almond Energy Balls

Hey my foodies and non-foodies alike. School is in full swing for my two daughters which means leaving early and coming home pretty late. And all though I like to think of my children as always being so full of energy, I know they need a little boost sometimes. I had been hunting for a snack idea for them that would give them energy and have healthy ingredients minus the chocolate and peanuts since they are allergic. I came across the energy balls or bites. These were perfect because I could tailor them to each of my kids. So I ended up making apple cinnamon balls and blueberry almond balls, each with different type of butters. And better still, there was no bake involved. So here is what I used:

4 cups of rolled oats (2 cups each batch)

2 cups ground flaxseed (1 cup each batch)

2 cups sweetened shredded coconut (1 cup each batch)

1 cup of honey ( half cup each)

1 teaspoon salt (half teaspoon each)

1 cup of almond butter

1 cup of sunflower seed butter

2 teaspoons of vanilla extract (1 teaspoon each batch)

1 tablespoon cinnamon

1 tablespoon ground cloves

1 cup of dried blueberries

1 cup of sliced almonds

1 cup of dried apple rings cut into bite sizes

1 baking sheet lined with wax paper or parchment

2 large mixing bowls

10762792000_IMG_2683

For all the oatmeal, I warmed in a frying pan to make the oats a bit easier to incorporate. I used my favorite Red Cooper Frying. If you want to go and get it, her is my Amazon Affiliate link. I love this pan so much!!!

https://amzn.to/2CTvSSY

So to each mixing bowl add in 1 cup of ground flaxseed, 2 cups of oats, 1 cup coconut, half cup of honey, teaspoon of vanilla extract and half teaspoon of salt.

10762739056_IMG_2698

Each cup of butters, you want to melt a bit in the microwave to make it easier to handle.

For the apple cinnamon batch: add in the tablespoon of cinnamon and ground cloves, the almond butter and the pieces of dried apple. Mix well

10762675008_IMG_2696

For the blueberry Almond batch: add in the dried blueberry and sliced almonds and the melted sunflower seed butter. Mix well.

Now the fun part for those who love to get there hands messy, so it is a great cooking activity for kids. Time to roll out the balls. If when you begin to roll the balls out and you find that they are breaking apart, this is because they are to dry and you need to add a few tablespoons of water to help them roll easier.

10763586224_IMG_2695

Make the balls as big or small as you like them. I used a healthy tablespoon size and formed a tight ball in my hand, then place them on the bake sheet.

10762854272_IMG_2712

Once everything is rolled out, place then in the fridge for 20 minutes so they can set, after which you want to store them in a airtight container. They should keep for over a week or so, however if you get the response that I received at my house, they will barely last 4 days or so.

If you would like to see the actually process, head over to my YouTube and checkout the video her at Energy Balls | Apple Cinnamon…

10763577568_IMG_2715

Until next time, Cook Eat Enjoy!!!!

Posted on

Small Home Veggie Garden

So this particular blog posting is to give some substance to my future post. I will be mentioning my garden quite often, so I thought I should show my efforts in bringing it along.

I have been in my house for almost a year (a year in late August 2011) and I had plans on making a vegetable garden as soon as I moved in, but that was very unrealistic. However, during the fall and winter, I did my research on veggie gardening and such. In the end, I decided to do a raised garden in the front of my house because the back of my house doesn’t get Sun because of large pine trees and the side of my house only gets about 3 hours of Sun a day because of the privacy fence.

I have always wanted to plant a garden when I got a house, but I also really wanted to do this because I wanted to save money. Food is expensive!!! So what better way to save money in the long run than growing your own veggies.


So I started at the beginning of April this year (2011). I had some spider attracting bushes in the front of my house that I wanted to get rid of so I trimmed them back with hedge clippers and then dug up the roots. My daughters had fun helping me.

That took some hours, but I was grateful they were gone. Instead of stopping for the day, we continued on and put together two 4ft by 4ft raised beds. I bought them from Home Depot for under $40 a piece (I purchased everything for my garden from Home Depot). Putting them together was very easy, even a kid could help do it. 🙂

When they were done, my daughter and I carried it over to the spot in front of my small front porch that we cleared out. After that was placed, I added 4 trellis because I planned on growing peas and beans. There are so many different kinds of Trellis

I decided on two 6ft wood fan trellis and two 3ft fan trellis. That way, when my peas and beans begin to grown up the trellis, it will also provide shaded cover for the front of my porch. I had to anchor the trellis with some wired ribbon, that is typically used to train your plants to grow up the trellis. I anchored it to the raised bed frame. I didn’t want to use the mounts because I didn’t want to drill into the front of my house.

I put two up one day and added the soil. The next day I added the other two and the rest of the soil. Now for soil. I used Miracle Gro Garden Soil for Flowers and Vegetables. They have small bags and they have really large 20 pound bags. I started with the small bags and then got big bags. I think I used about 200 pounds of soil when it was all done (more or less).

Now, some things I grew from sprouts and some things I grew from seeds. So I started planting April 4 and 5.
From Sprouts: Broccoili, Romaine Lettuce, Spinach, Flat leaf and curly Parsely, sage, rosemary, leeks.
From Bulbs: Yellow Onions, and Red Potatoes
From seeds: Sweet Peas, Bell Peppers, Collard Greens, Baby Buk Choy, Carrots, Basil

From this pic, most of the veggie are on the right, but on the left is the leeks, onions, broccoili, basil rosemary.

I was so excited, when I started seeing my first seeds start to sprout (the carrots and greens) about 2 weeks later

So everything was going great, until we had 1 late frost in late April. I was not paying attention to the news and didn’t find out until the following morning. Most of the veggies that I planted are frost resistant, except for the broccoili. So needless to say, they were the first to go.
Then not long after that my greens died. But everything else continue to florish. As you can see from the above pic, the Collard Greens are the ones that are starting to wilt in the middle. My Bell Pepper plant also did not sprout.

At the beginning of May, I ran into another problem, some stray dog kept doing it’s business in the empty area of my garden. I was going to go and buy a fence to put around it, although I really didn’t want to, but instead, my mother told me to put some black pepper down, and surprisingly it worked.

So this next photo was taken last week. My potatoes have gone crazy and are spreading, which I knew they world, however, they over-shadowed and smuthered my Buk Choy and thus, they died. I also started to train my Sweet Peas by tying them around the trellis with some gardening ribbon.

Additionally, in this photo, everything is growning nicely except my basil didn’t sprout properly .

Now, last week, I had to harvest some of my spinach, ( I need to harvest some of my Romaine to, but I don’t have room in the fridge yet 😉 ) that is why two pictures up you can see a silver strainer, and the next few post will be about 3 amazing dishes that I made using the spinach.

I also added a few more veggies to my garden last week.
From Sprouts: Bell Pepper (since it did not sprout from seed), cherry tomato and yellow curve-neck squash.
From seed: Green Beans, Asparagus Beans (like chinese long beans), Corn

Now I am waiting for the new additions to sprout and florish.

I am only 2 months into this veggie garden, and although I have had some set backs, I have had a lot of success. I will continue to update.